By Allen Pangilinan – IndyConn’s Director of Innovative Solutions
As the world continues to grapple with COVID-19 and the country approaches the reopening of businesses and offices, we all need to be persistent in controlling the spread of the virus. As a result, new rules, regulations, and recommendations are being implemented to keep the workplace safe and clean.
Traditionally, a clipboard, a piece of paper, and a pen is all that is needed to keep a record of when a particular area was last cleaned. However, due to COVID-19, we want to minimize physical contact of objects shared in the office. Leveraging Office 365 SharePoint and PowerApps, we can build a simple mobile app to scan QR codes and track when an area was last cleaned and by whom.
Even if you have never worked with PowerApps before, this post will walk you through the process step-by-step so that you can build your own app.

STEP 1 – GENERATE QR CODES
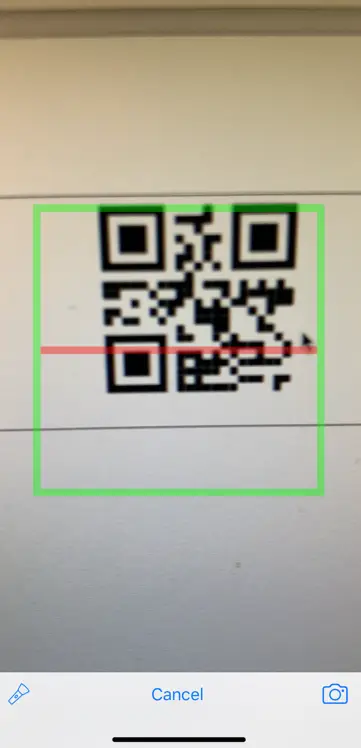
For each area to be tracked, create a QR Code for the corresponding text for that location. For example, I created QR codes for Lobby, Kitchen, and Conference Room. These QR codes can then be printed out and placed in that area.
| Lobby | |
| Kitchen | |
| Conference Room | |
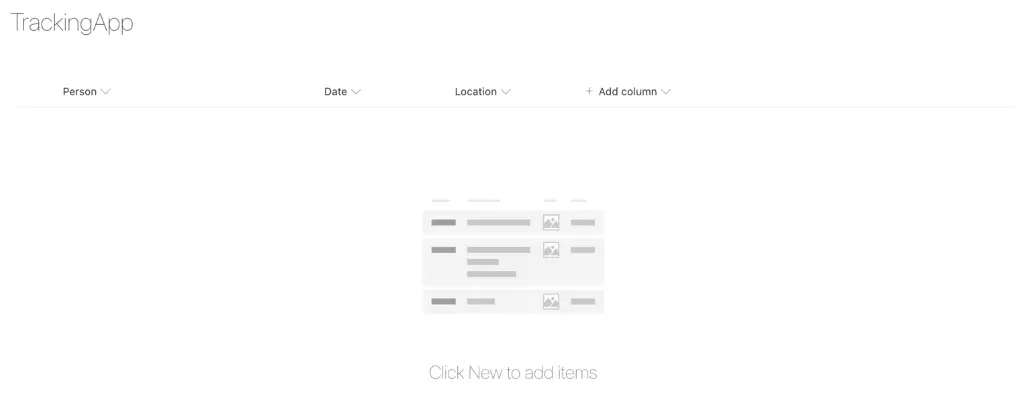
STEP 2 – CREATE A SHAREPOINT LIST
The SharePoint List will be the data repository to keep the tracking history scanned in from the PowerApp
TIP: Keep in mind that the users using the PowerApp will need edit privileges to the SharePoint list.
Build the list with the following Data Fields:
| Data Field Name | Data Type | Notes |
| Date | Date | Be sure to enable the Include Time slider |
| Person | Single line of text | |
| Location | Single line of text |
If preferred, you can make the one of the listed fields the Title field
STEP 3 – CREATE THE POWERAPP
While you do have the option to create a PowerApp directly from the SharePoint list, I will demonstrate creating a PowerApp from scratch.
Launch the Power Apps from the Office 365 app launcher and select the option to Create
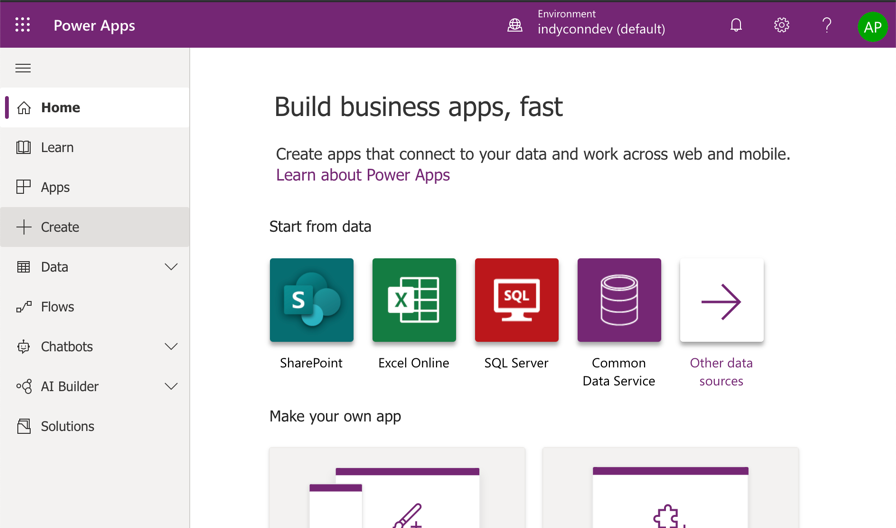
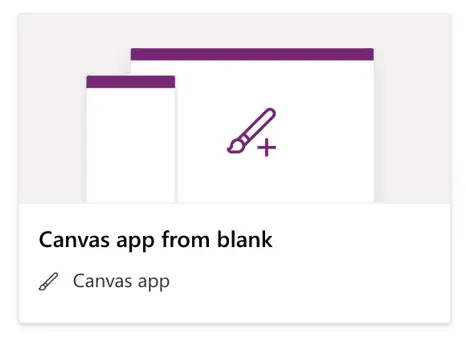
Select the option for “Canvas app from blank”
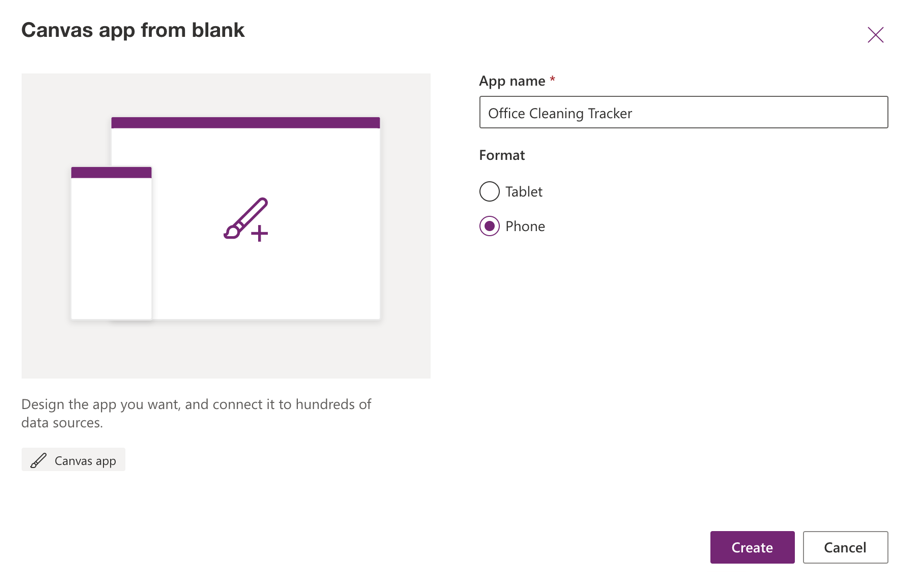
Name the App and select “Phone” for format then click create.
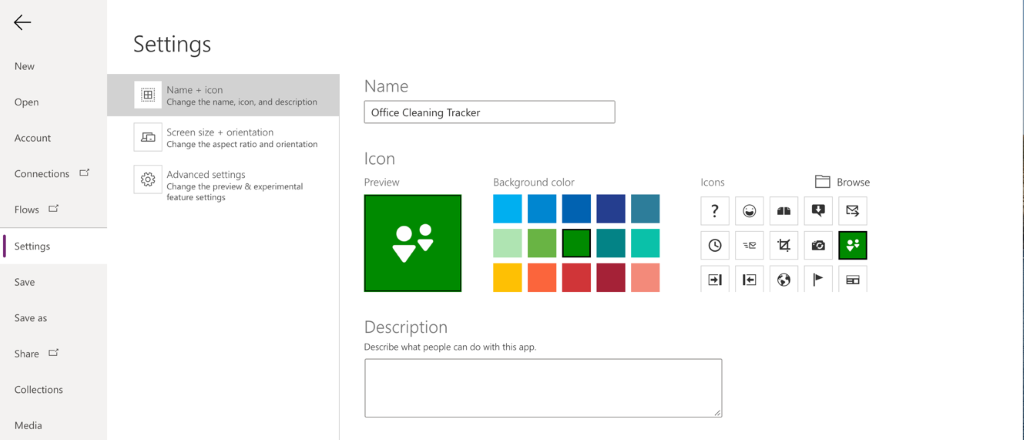
When the App designer opens, one of the first steps I like to do is navigating to File then selecting my icon for the app and Saving the App. After the first Save, Power Apps will automatically save as you work on your app, this will prevent you from losing any work you have done.
Coming back to the design screen, we’ll want to make a connection to the SharePoint list we had created in STEP 2. Select Data Source from the menu, then select SharePoint from Connectors
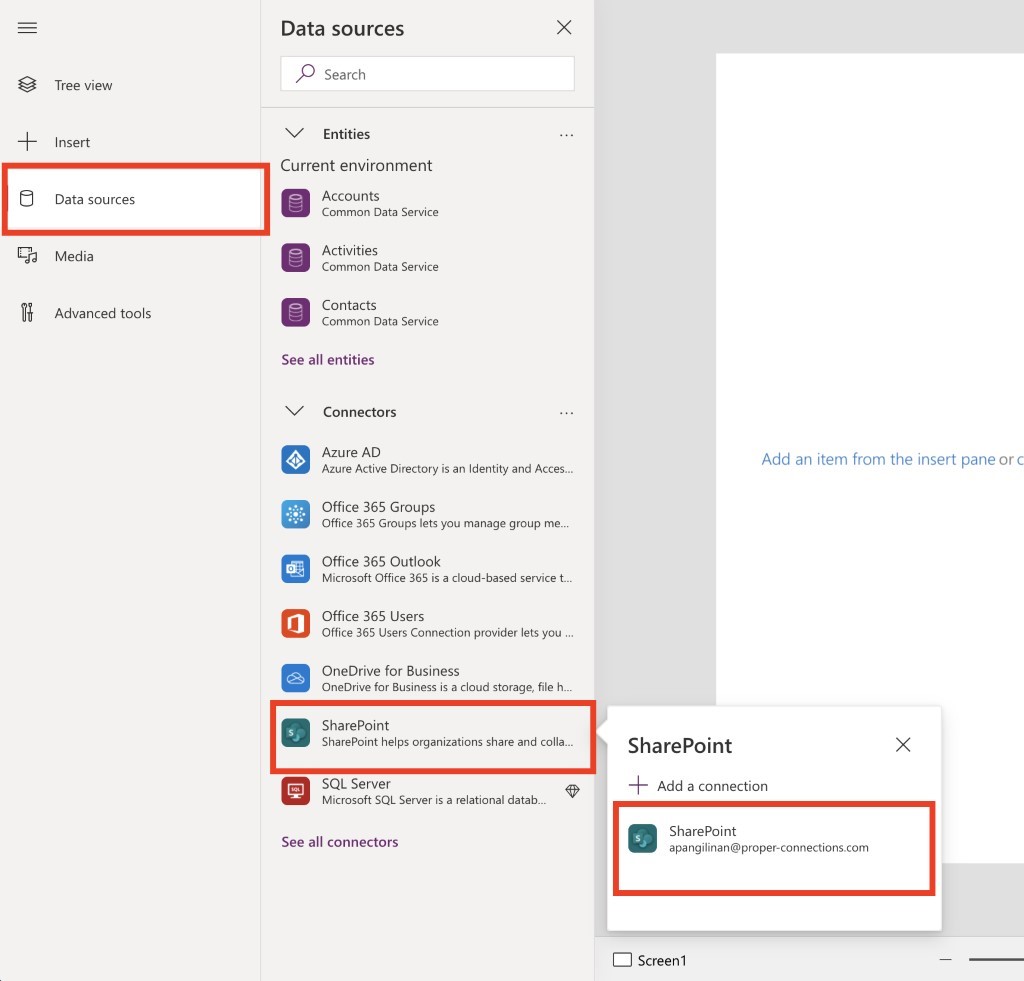
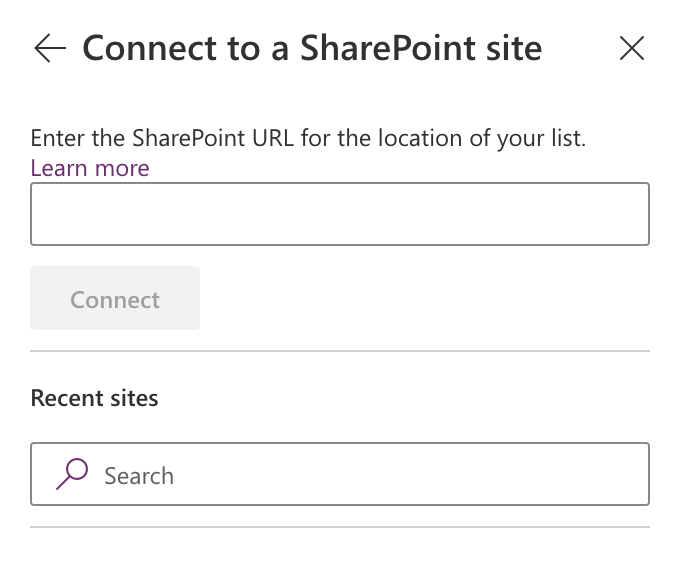
Type in the URL for the SharePoint site that the list resides in or select the SharePoint site from the list of Recent Sites. After clicking connect, you will be able to select the SharePoint list from STEP 2.
Now that PowerApps has a connection to the SharePoint List, we can start building out the screens for the App. Coming back to the tree view, we have a blank screen. Let’s add a form so that we can populate data into the list.
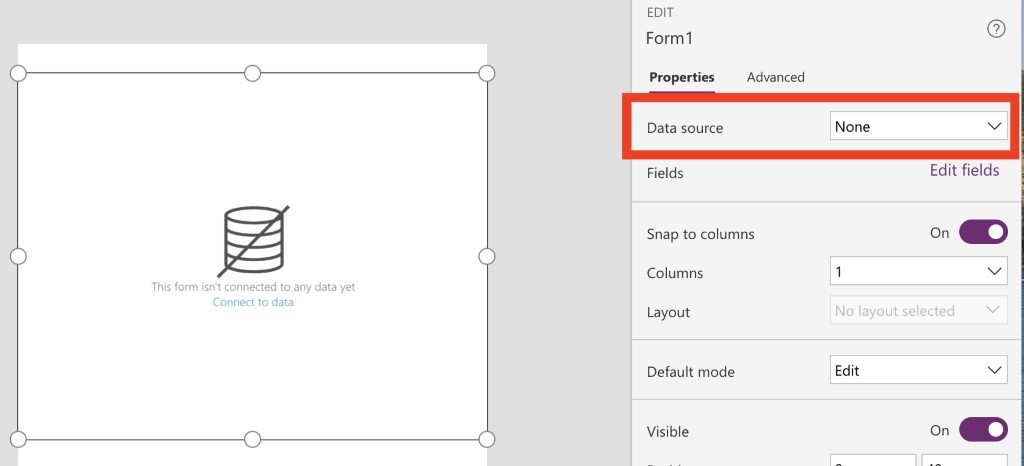
With Screen1 selected, click on Insert > Forms > Edit

You’ll see a new Form get added to the screen. To connect it to the data source click on the Data Source Drop down and select the SharePoint list
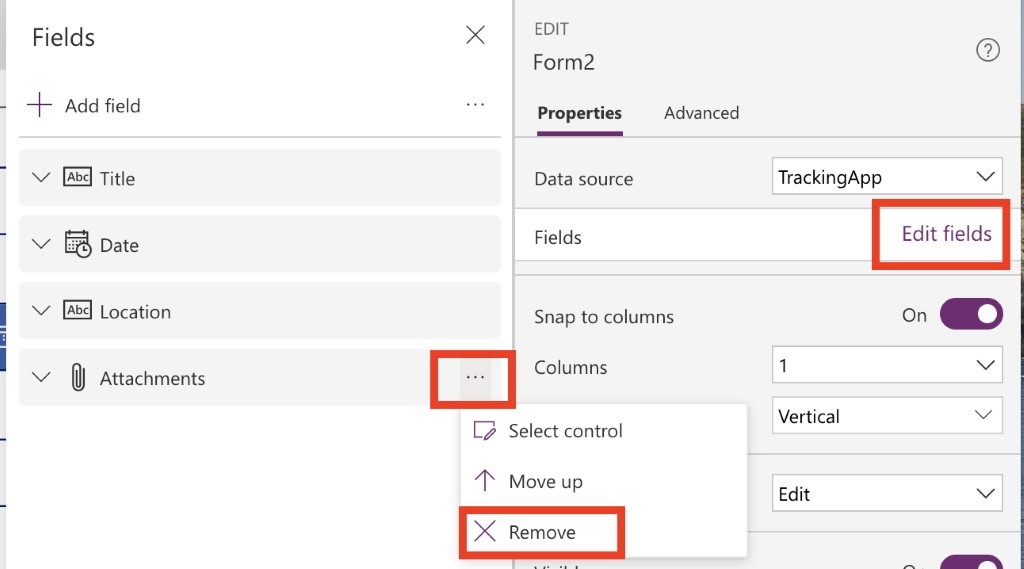
After adding the data source, Power Apps will automatically populate the form with the fields from the SharePoint list. We can remove the fields we don’t need by selecting Edit Fields in the property menu
Auto populating Date and Time
When a user is using the App and scanning a location, we want the app to automatically submit with the current date and time. We also don’t want to allow users to be able to manipulate the date and time within the app.
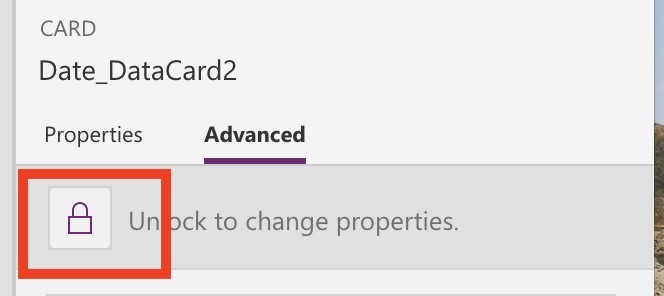
Selecting the Date data card, go to Advanced and Unlock the card
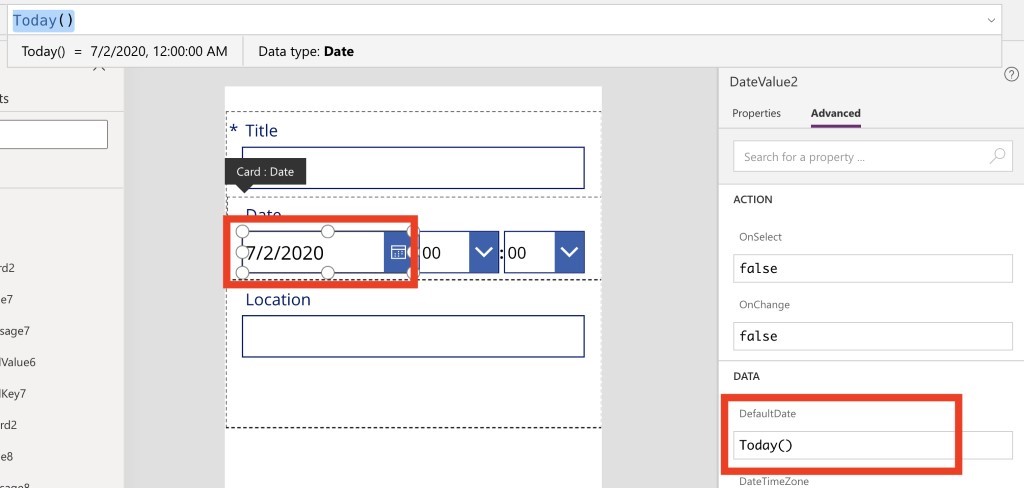
With the Date Data Card unlocked, select the DateValue field and in the Advanced Properties of the field set the Default Date to: Today()
Select the HourValue field and in the Advanced Properties of the field, set the Default to: Text(Hour(Now()), “[$-en-US]00”)
Select the MinuteValue field in the Advanced Properties of the field, set the Default to
Text(Minute(Now()), “[$-en-US]00”)
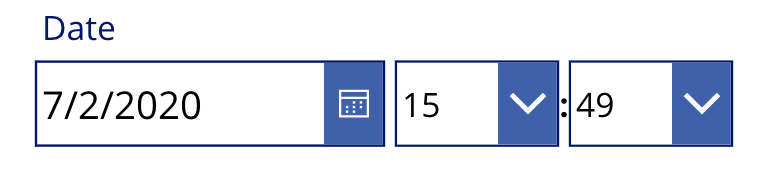
The Date should now reflect the current date and current time.
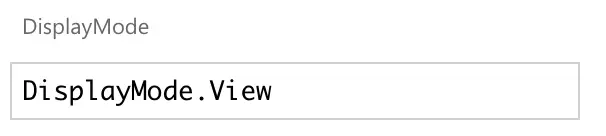
Let’s set the whole Date DataCard field to read-only. Select the Date Data Card then go to the Advanced tab. In the Design section, select More Options and scroll to the bottom to see the property “DisplayMode. Set the property to “DisplayMode.View”.
Auto Populate the User
For the person field, we will want to auto-populate the user’s name who has the app open. Selecting the Person Data Card we want to go to Advanced and unlock the Data Card.
With the Data Card unlocked, click on More Options. We’re going to change the Default to: PlainText(User().FullName)
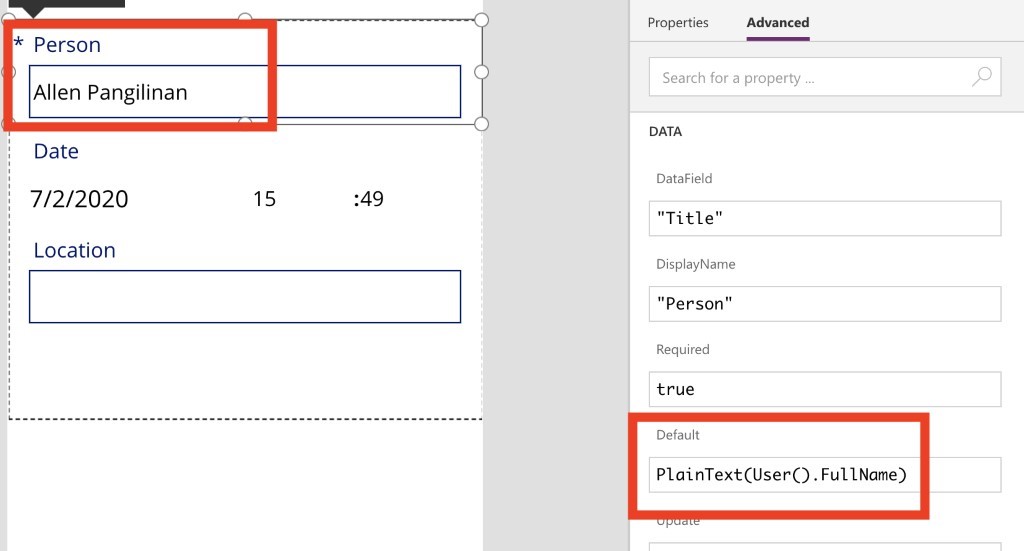
Similar to the Date and Time field, we want to set the person field to read only. This can be done by setting the DisplayMode to “DisplayMode.View” under the Advanced Design Options for the Data Card
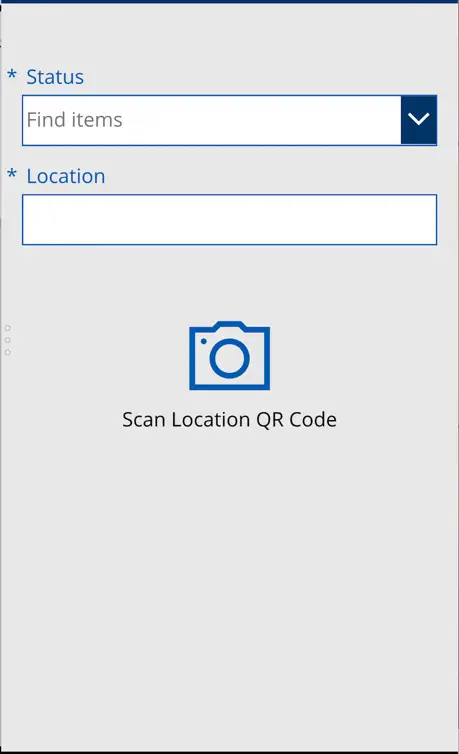
Add Barcode Scanner and populate the Location field
The coolest function of this Power App will be the Barcode reader. This will allow the user to user the camera on their phone to scan the QR Code from STEP 1 and will populate the location field with text.
With the screen selected, navigate to Insert > Media > Barcode scanner
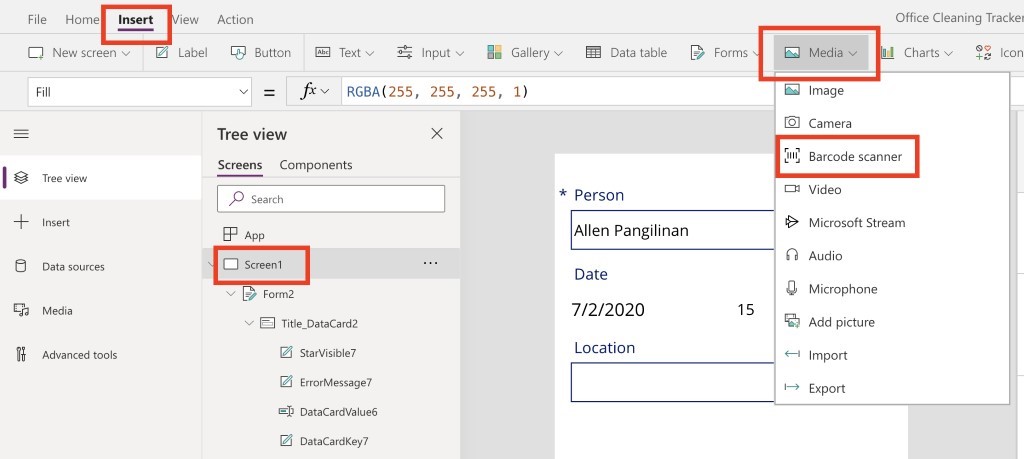
A new button will appear on the screen. This is the button the user will tap on to activate the scanner.
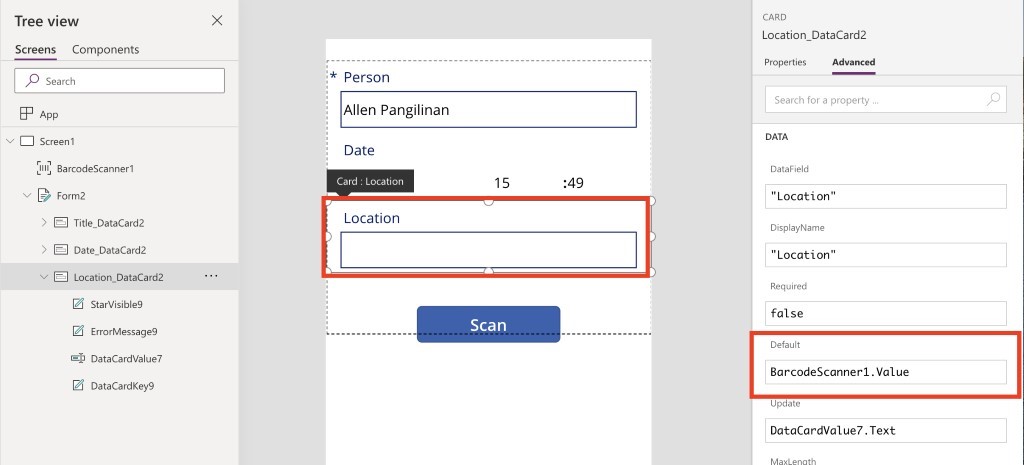
In the Location DataCard, we’re going to update the default value to accept the output from the barcode scanner. Unlock the Location DataCard and then update the Default to: BarcodeScanner1.Value
Submitting an Entry
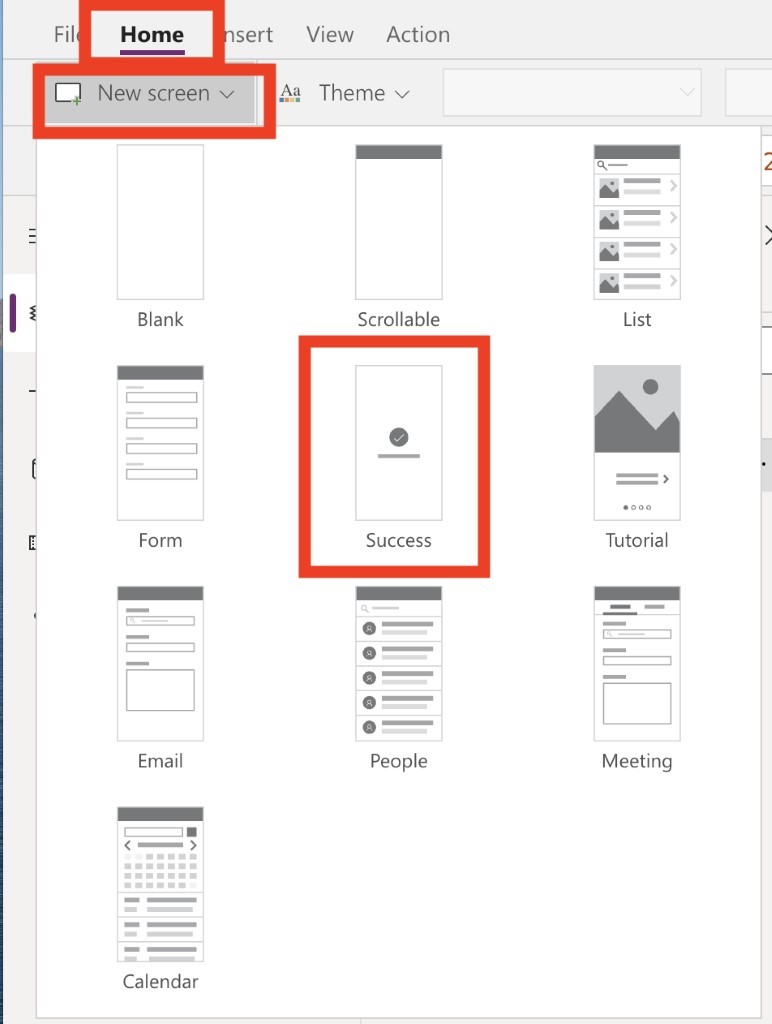
Once the user has scanned their code, they will want a way to submit the entry and receive confirmation that the entry was successful.
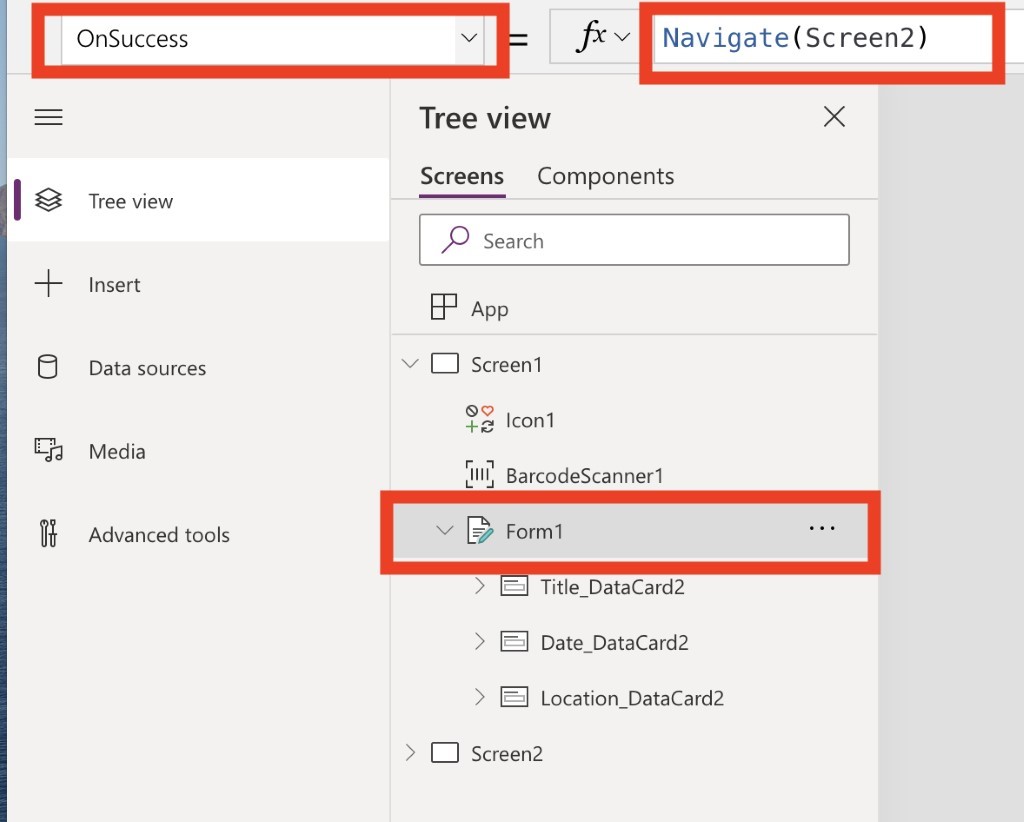
We can create a success screen by Navigating back to Home > New Screen > Success
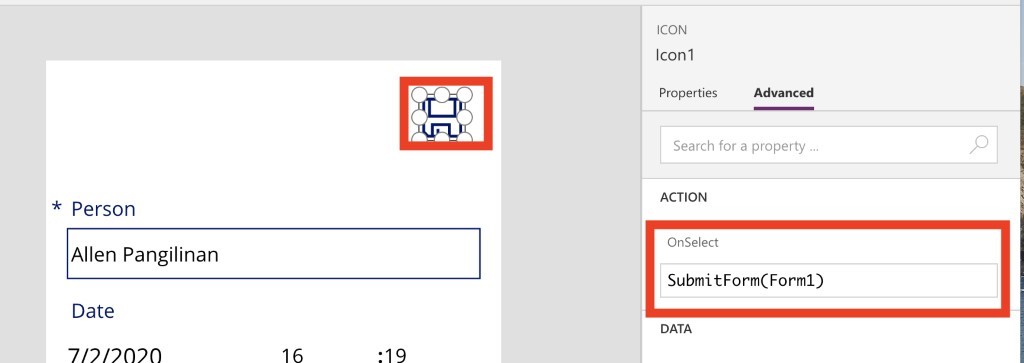
With the success screen created, go back to your submission screen and add a button or icon that will be used to Submit the entry. In the properties for the Icon or Button, set the OnSelect Action to: SubmitForm(Form1)
To navigate to the Success Screen after a successful submission, select the Form, then select OnSuccess from the Property drop down menu. In the function field type in: Navigate(Screen2)
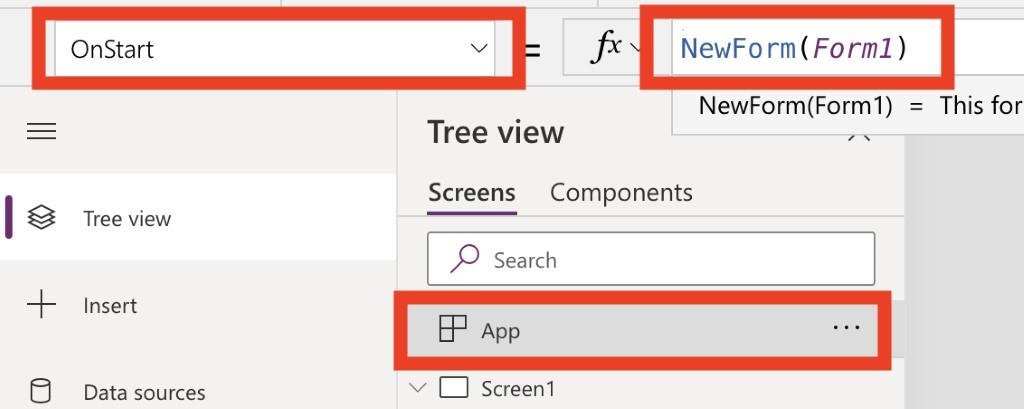
OnStart
The last major piece we need to do is create OnStart function to create new entry form every time the app is started. In the Tree View, highlight App at the top of the list. Select OnStart from the property drop down and in the function input type in: NewForm(Form1)
Publish, Test, Share, Customize it!
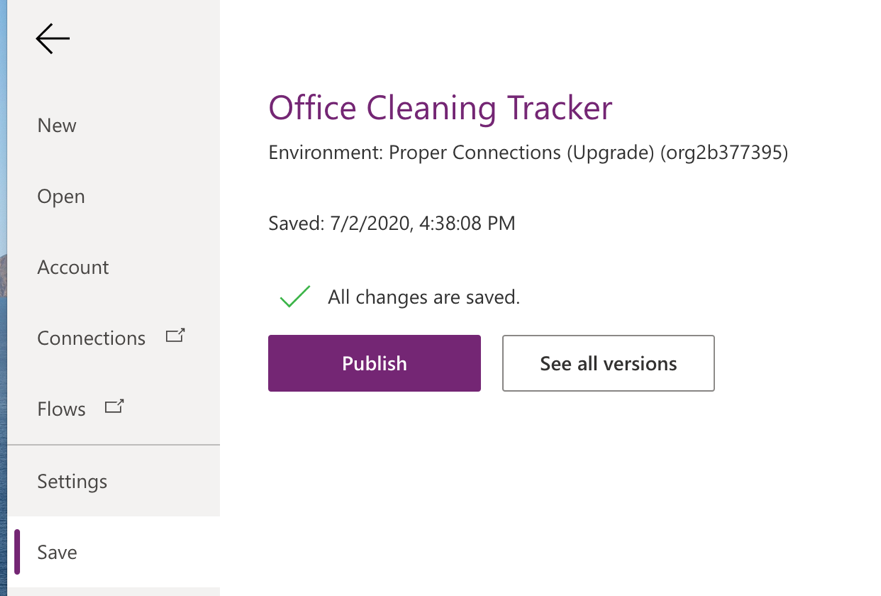
Now that all the key components have been built and configured, you can go ahead and Publish the app by going to File > Publish.
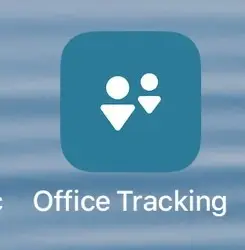
After Publishing the App, if you don’t already have the Power Apps mobile app installed on your mobile device, download it from the Android or iOS App Store. After downloading and authenticate with your O365 account you should see your Office Tracking App.
For simplicity of writing this article, we didn’t do much to make the screens look pretty. I encourage you to play around with it and have some fun with it. It’s a great way to get more familiar with PowerApps!